No items found.

Add a Video Campaign to Your Adwerx Listing Promotion

We’re excited to share that you can now enhance your Adwerx listing promotion with a month-long video campaign. After purchasing your listing advertisement, you can boost the visibility of your property and impress your seller with engaging video content. 

When you choose to add a video campaign to your listing promotion, we will create a new dynamic video using images of your listing and the property details you added to your original advertisement. 

There are two easy options for creating a video ad to complement your existing listing campaign:

Option 1: After your ad goes live

For those with Automated Campaigns provided by your broker, you’ll receive a notification when a campaign has been set up for your listing. At this point, you can purchase a video campaign to complement the free campaign provided by your broker.

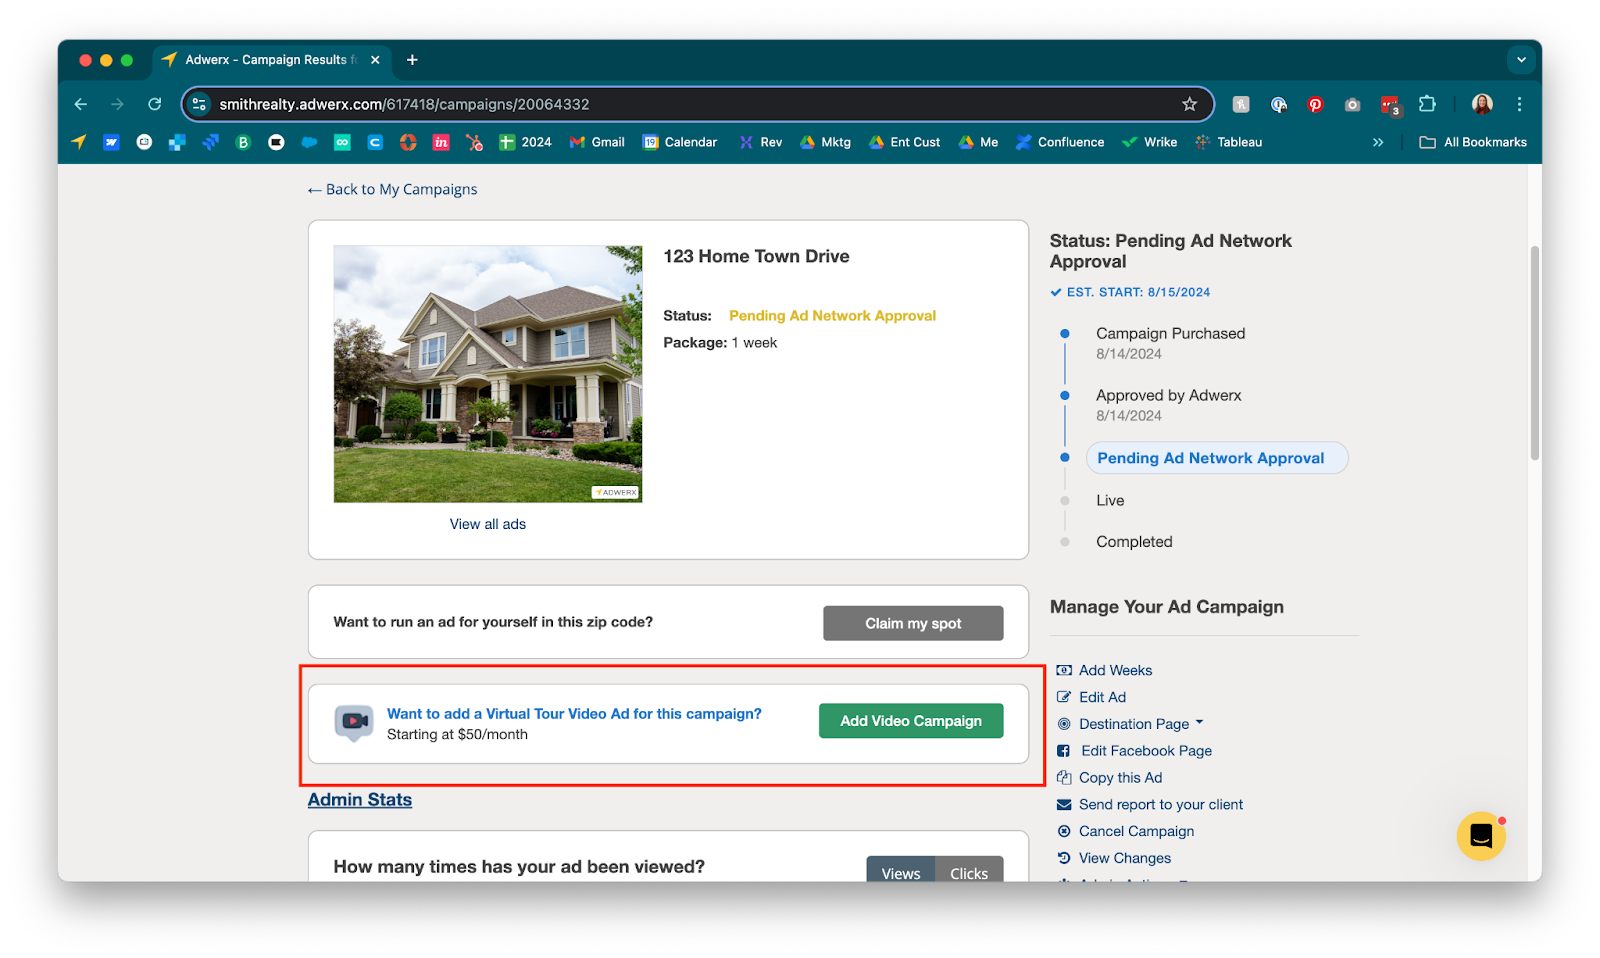
Once your listing ad is live—whether created by you or your broker—you can easily add a video from your campaigns results page or the My Campaigns page by clicking ‘Add Video Campaign’ or ‘Add Virtual Tour Video Ad.’

Option 2: Immediately after purchase

Once your listing campaign purchase is confirmed, you can create a video campaign directly from the receipt page. 

Frequently Asked Questions

How long will my video campaign run? 

Your video campaign will run for a minimum of 4 weeks. In contrast, listing ads offer more flexibility and can be purchased in increments of 1 to 5 weeks. While these campaigns are related within our system, each campaign operates independently with its own controls. If you’d like to extend your listing campaign to match the length of your video campaign, you can easily add additional weeks from your Campaign Results page.

Do I need an existing video walkthrough? 

No, you don’t need to have an existing video walkthrough to run a video ad. You can upload an existing video of the property if you have one, but you can also create a slideshow-style Virtual Walkthrough video from scratch using static images of the property.

How will my ad be targeted?

When you set up your listing’s video campaign, you’ll have the option to choose between geographic targeting or custom audience targeting. Geographic targeting is great for promoting the home to potential buyers in the vicinity of the property or within a specific neighborhood. Custom audience targeting is perfect if you want to reach out to an open house attendee list or specific contacts from your database.

If I want to use a video I produced, what are the technical requirements to upload my file?

Your video must meet the following specifications:

  • File Type: .mp4 or .mov
  • Size: Up to 300MB
  • Duration: Less than 90 seconds (videos longer than 90s will be cut off, but we recommend keeping it under 60 seconds for best results)
  • If your video file is too large, you can find tips for reducing file size here.

How many impressions should I choose? 

Impressions are the number of times your ad will appear on websites or social media. For a larger custom audience or geographic area, consider purchasing more impressions. If you need help determining the right number of impressions, use our live chat feature or schedule a free consultation with our marketing specialists. As a reference, our standard listing ad campaigns include 7,000 impressions per week for a 15 mile radius around the property. 

Will my seller be notified of this campaign?

Currently, only standard listing ads will be included in seller reporting emails. However, we are working to include both campaigns in seller reports. We hope to have this feature available soon. 

Steps for Creating a Video Ad

Step 1: Choose Who You Want To Target

Targeting Your Existing Network: If you wish to target your current referral network, mailing list, or database, select ‘My Sphere’. During the ad creation process, you’ll be prompted to upload a list of contacts. You can target contacts by email address, phone number, or physical address. We recommend uploading between 300 and 500 contacts per 1,000 impressions purchased.

Targeting a New Audience: To reach new potential buyers and sellers in your local area, choose ‘My Local Area’. You’ll then select a geographic region on a map where you’d like your ad to appear.

Step 2: Choose Your Video Creation Method

Decide how you want to create your video ad:

  • Upload a Finished Video: If you have a finalized video of your listing, simply upload it using our custom upload option.
  • Add Details to an Existing Video: If your walkthrough video needs some polishing, upload it and add property details and your contact information using a templated overlay.
  • Create a Video from Static Images: Use our pre-built templates to turn static images into a video slideshow.

Step 3: Select Your Video’s Orientation (Required for Enhance Your Video Option and Create with Our Video Templates)

When uploading a video for enhancement or creating a video from images, you'll need to specify the orientation of your base video or images (Vertical or Horizontal). This helps our software correctly adjust the dimensions and apply the right templates and overlays. If you decide to change the base video file for your ad, and your new video has a different orientation, you will need to return to this step and change the setting prior to uploading a new file. 

Step 5: Upload Your Files

You’ll be prompted to upload either your finished video or images for a new video. Customize any text associated with your ad, and note that even with a finalized video, you’ll need to personalize the text displayed next to your video on social media platforms.

Step 6: Enter Your Landing Page

Adwerx Video Ads are web-based ads and thus clickable, so you’ll need to select the web page you want users to be directed to when they click on your video.

Step 7: Set Your Impression Count

Impressions represent the number of times your ad will appear on websites or social media. Consider purchasing more impressions if you are targeting a larger custom audience or geographic area. For guidance on how many impressions to choose, use our live chat feature or schedule a free consultation with our marketing specialists.

Step 8: Choose Campaign Duration and Billing Cycle

Select the billing cycle for your campaign—monthly, quarterly, or annually. Your ad will automatically renew at the end of each billing term unless you turn off auto-renewal in your campaign settings. Each billing cycle is paid upfront.

Step 9: Purchase and Launch Your Campaign

After purchasing, your campaign should launch within 48 hours, pending a review by our team. You will receive regular email updates on your ad’s performance.

Still need help with something?

If your question isn't addressed in our help center, our Customer Support Team is ready to assist.

Contact Us