

How to Sync Lofty Contacts to Your New Sphere Campaign
Stay top-of-mind with your most important Lofty contacts using a Sphere of Influence advertising campaign from Adwerx.
Simply connect your Adwerx Sphere campaign directly to Lofty by entering your login credentials during the ad setup process and we will import the combination of segments, stages and tags for the contacts you want to target, or select the option to ‘Import All Contacts’ to target your entire database. Note: This is a one time sync and will need to be repeated to add additional contacts in the future.
Step 1: Start Your Campaign
If you aren’t an Adwerx user yet, go to https://www.adwerx.com/create-an-ad/sphere and fill out the Start Your Ad form to begin a new campaign, your new account will be created at checkout.
If you’re already an Adwerx user, log in and select + CREATE NEW AD on the left side navigation panel of your Account Summary page.

You will be directed to your Adwerx AdStore where you’ll see all the campaigns available for purchase. Select the Start New Campaign button to begin your campaign set up.

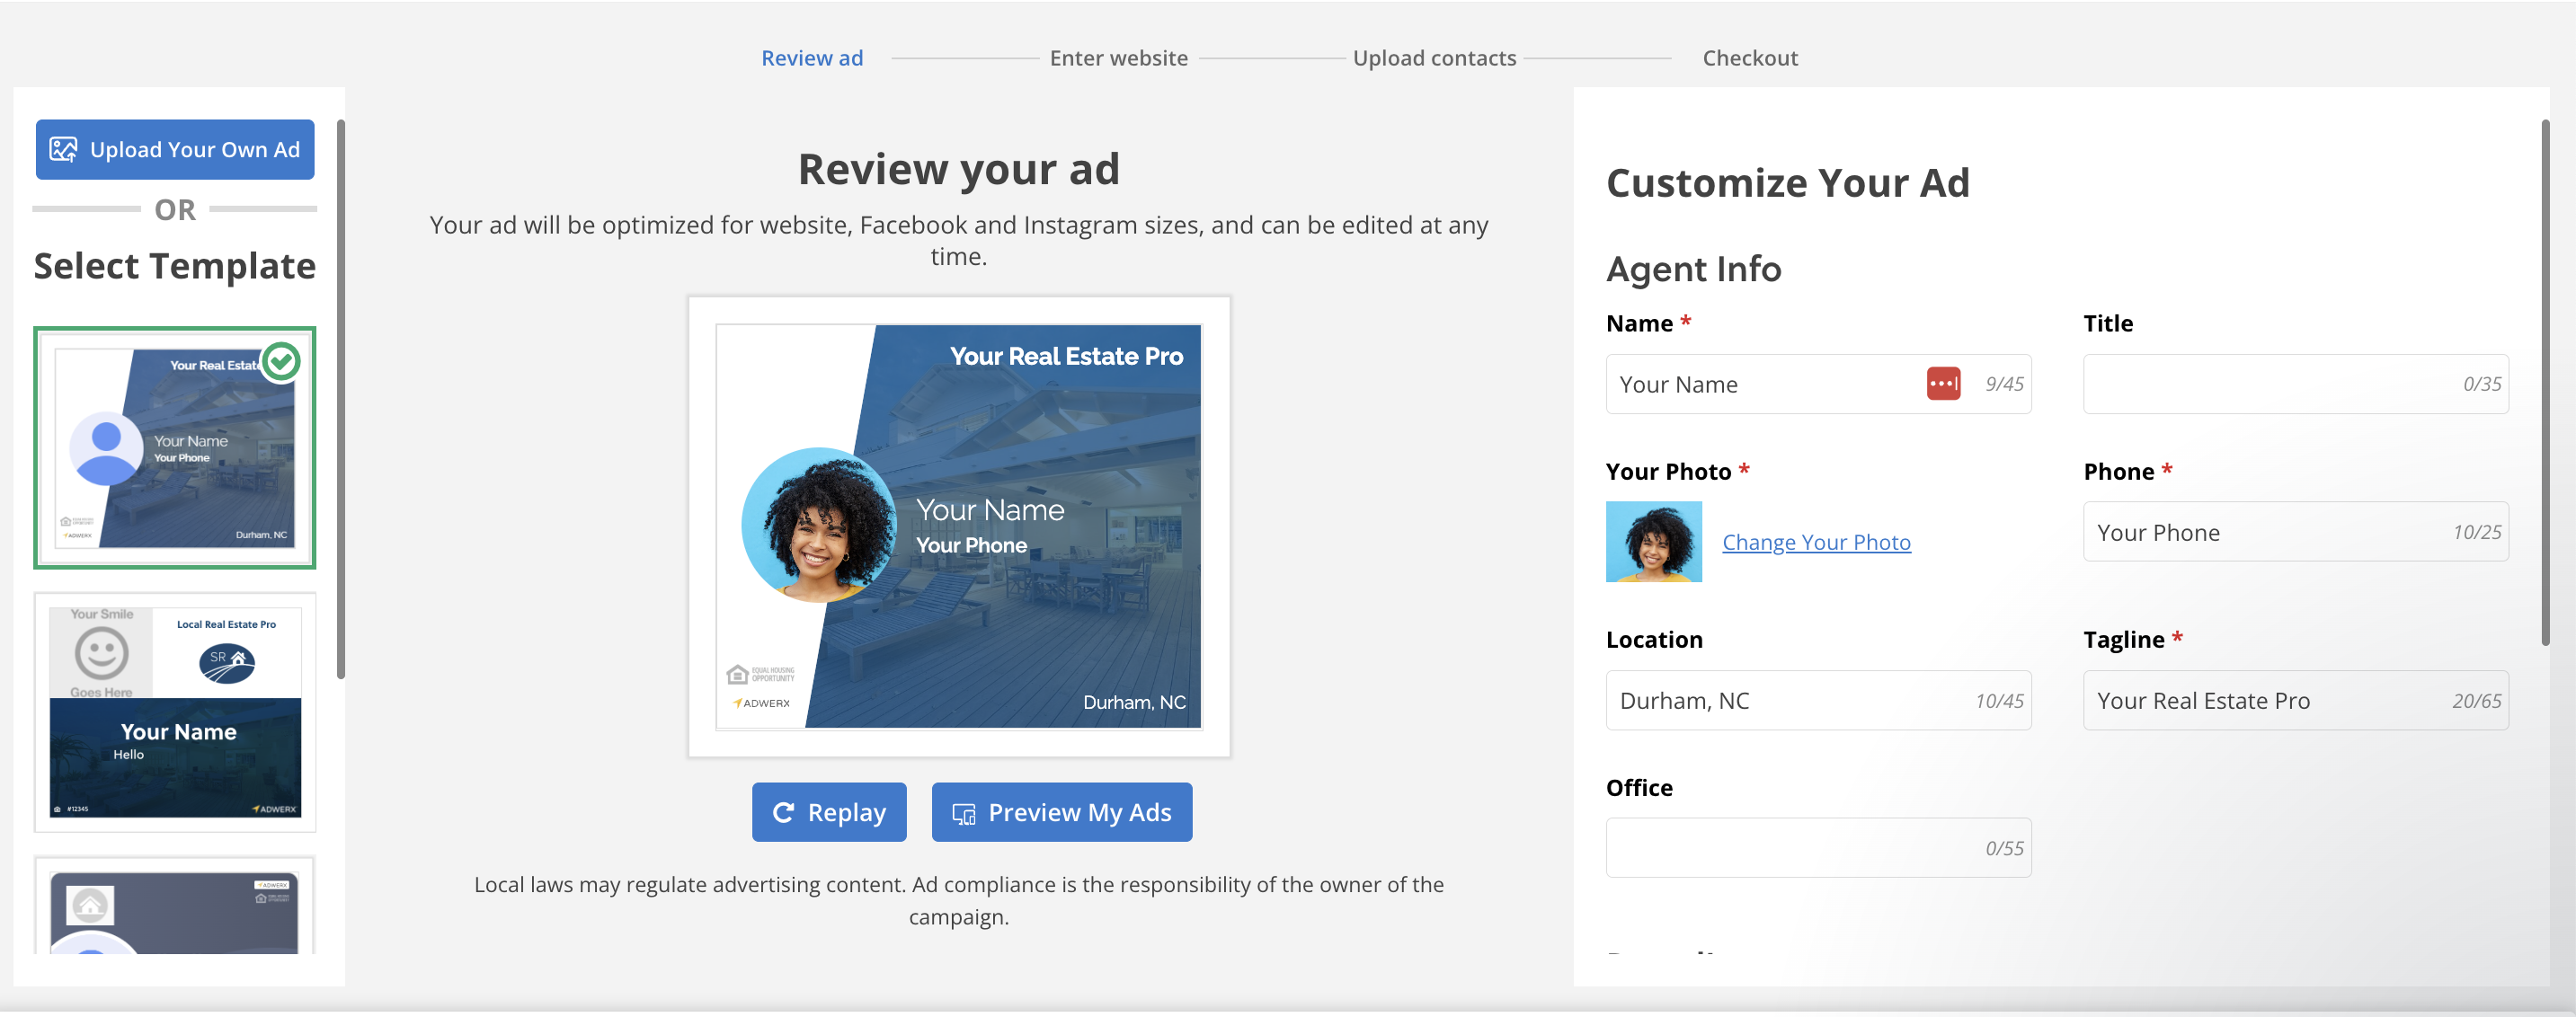
Step 2: Customize Your Ad Design
Once you start a campaign, your ad will automatically be created for you, but you can change any part of the ad! Once you’re finished designing, click Next.
Tip: Want to customize your ad even further? Upload your own design! For help completing this, head to this article.
Step 3: Connect Your Facebook Business Page to Run Your Ad on Facebook
Next, you will be prompted to connect your Facebook page if you haven’t already, or confirm which page you’d like your ad to run out of. If you are an enterprise partner, you will have the option to run your ad out of your company’s Facebook page. Choose Next when finished.

Step 4: Select Your Landing Page
Enter or copy and paste the website that you’d like your prospective clients to visit when they click on your ad. Click Next when complete.
Please note: This page should include branding that matches your ad, is publicly accessible and does not prompt downloads. Facebook pages, LinkedIn pages and Instagram pages are not recommended.

Step 5: Import Contacts From Lofty
You’ll be prompted to add the contacts you want to target to your campaign. Click Add Contacts to get started.

Click on the Import from Lofty button.

Enter your Lofty credentials in the login screen and Grant Access to your account.

Select if you want to Import All Contacts or import specific contacts using the Filtered Contacts option.

If you select All Contacts, a progress bar will display and contacts will be imported.

If you select Filtered Contacts a popup will display asking you to select the combination of segments, stages and tags to filter the contacts you want to import.

If you add more than one tag, an option will appear to allow you to choose between importing contacts which have all of the listed tags or contacts which have at least one of the tags.

Clicking the Import button will kick off the contacts import process.

Your imported contacts will be added as a targeting list and will show as ‘Lofty Contacts’.

Step 6: Upload Additional Contacts (optional)
We recommend uploading at least 500 for optimal ad delivery. If you’d like to add contacts not in Lofty you can import additional email addresses, street addresses and phone numbers.You have the option to upload a CSV or Excel file, import from Gmail or copy and paste your contacts.
Tip: Not sure who to add to your campaign? Check out this article.

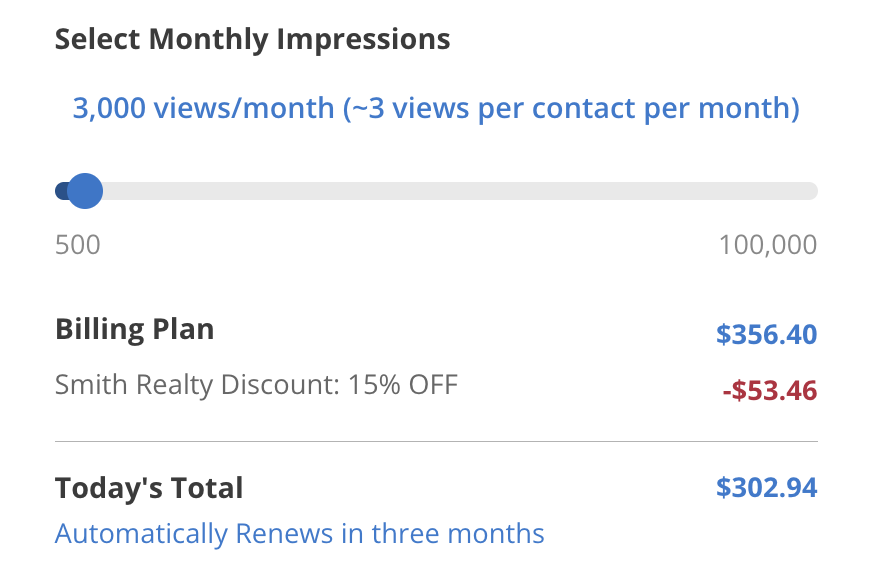
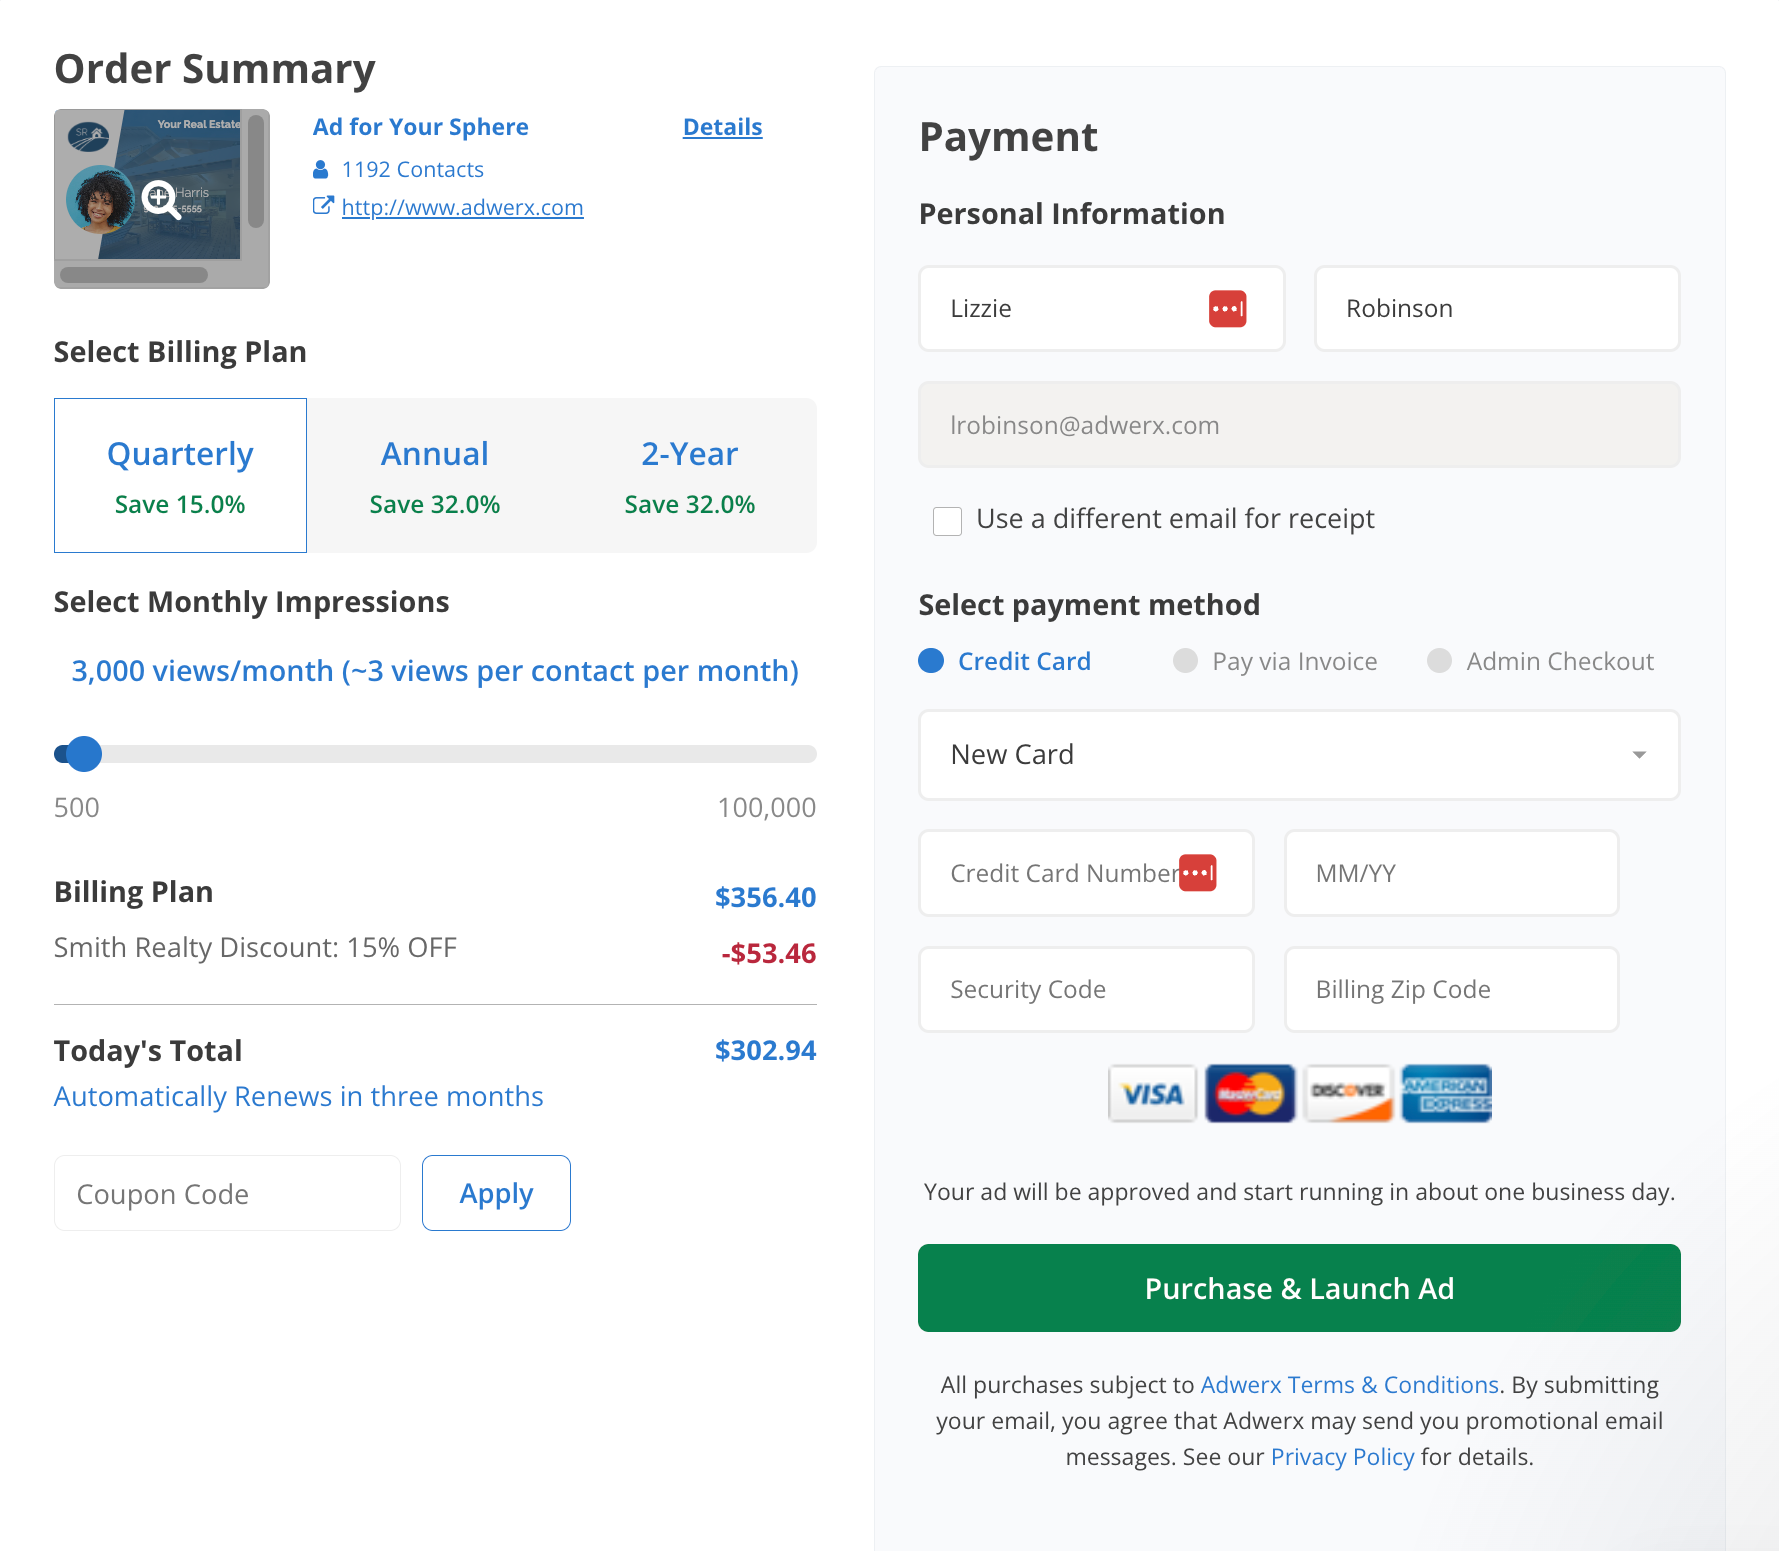
Step 7: Select the Number of Impressions You Would Like to Purchase & Checkout
As a best practice, everyone should see your ad 2-3 times per week to ensure you are staying top-of-mind with your audience.
To finish your campaign setup, select your billing plan and enter your payment information. Ensure your first name, last name and email address are correct and review your ad on the right hand side. Input your credit card information and click Purchase & Launch Ad.
Your ad will be sent for approval and will launch within 1-2 business days.
.svg)
.svg)
.svg)
.svg)

.svg)